Camera and Lighting Settings
In order for the perspective of captured garments and captured fashion models to match, they need to be captured using the same camera settings and perspective. Only this way will the garment’s perspective align with the model’s and the garment look like it’s being actually worn by the model.
This guide aims to establish a common ground for capturing both. Following these guidelines to capture fashion models will ensure they will match our captured garments and be correctly displayed using our technology. Therefore it is of the ultimate importance that the specifications and instructions given in this guide are executed exactly as described.
Minimum Equipment Requirements
Full Frame 35mm photo camera body
70mm Prime lens or equivalent zoom lens
Camera Tripod with Portrait function
Square ruler
Tape measure
Seamless white backdrop
3-4 flashlight head units with stands and soft-boxes
Light Jibs or other devices for direct lighting from above
Flags and bounce cards
Conventional professional grip gear such as clamps, grip heads and the like.
Set up
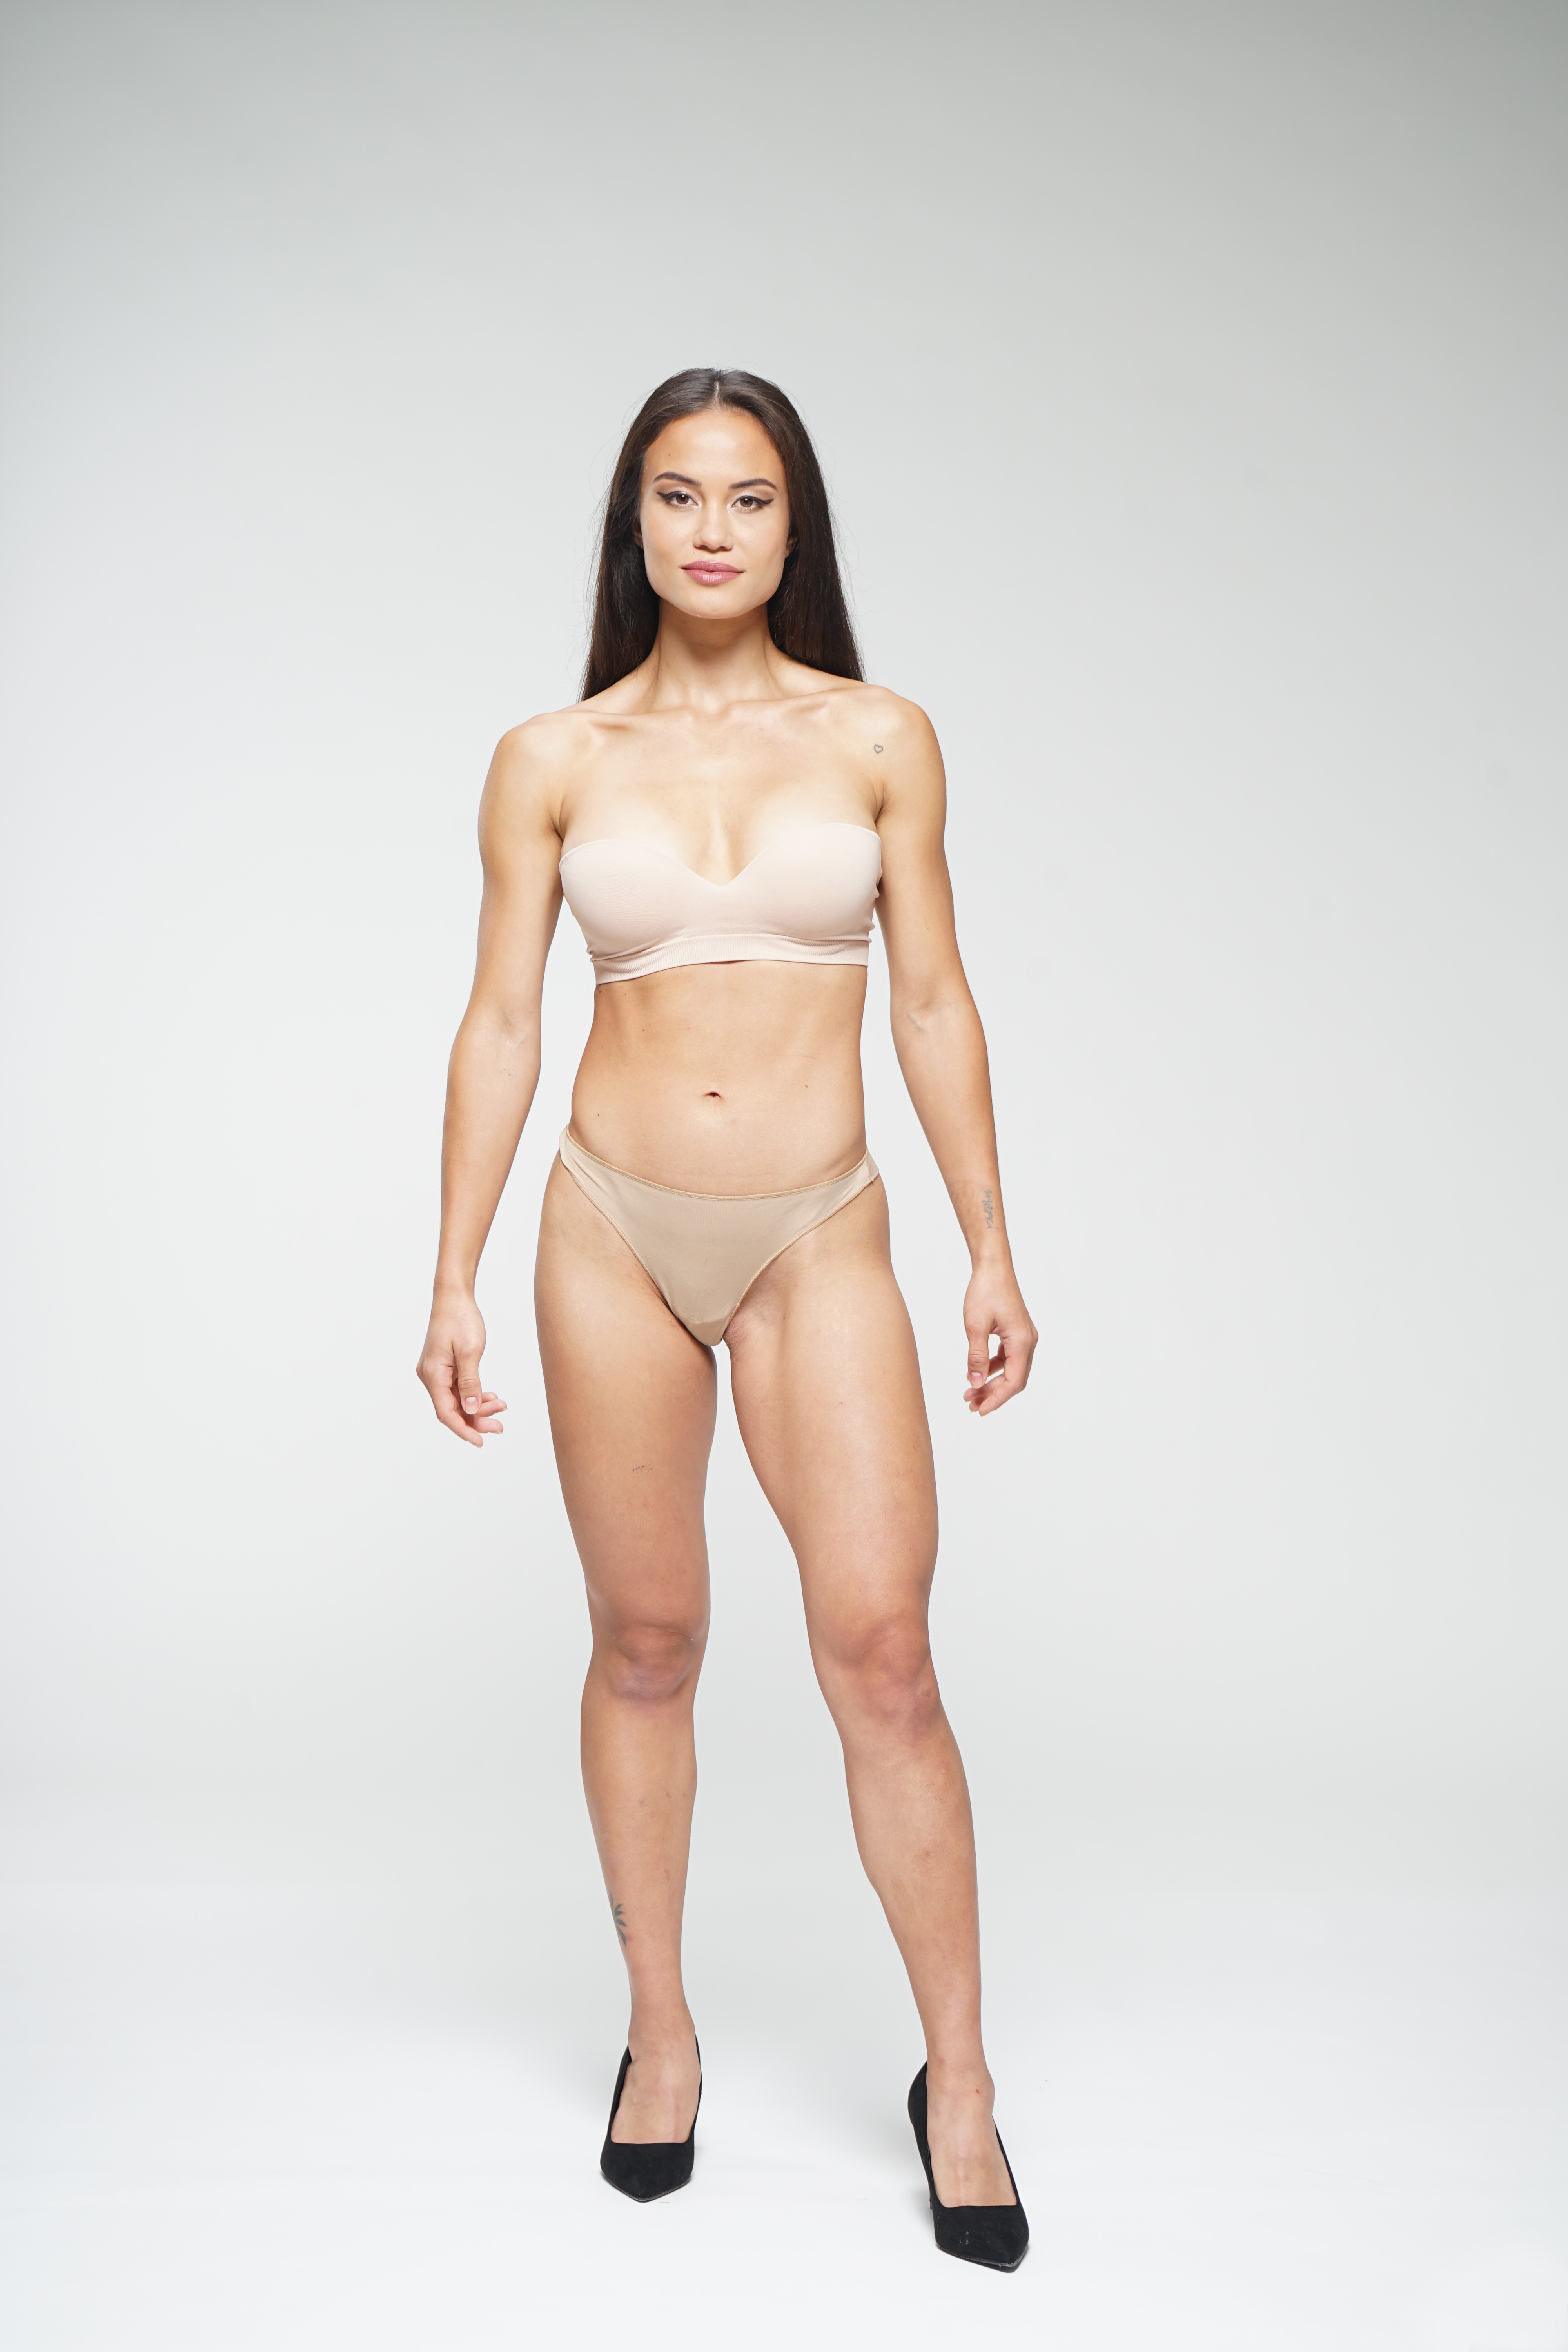
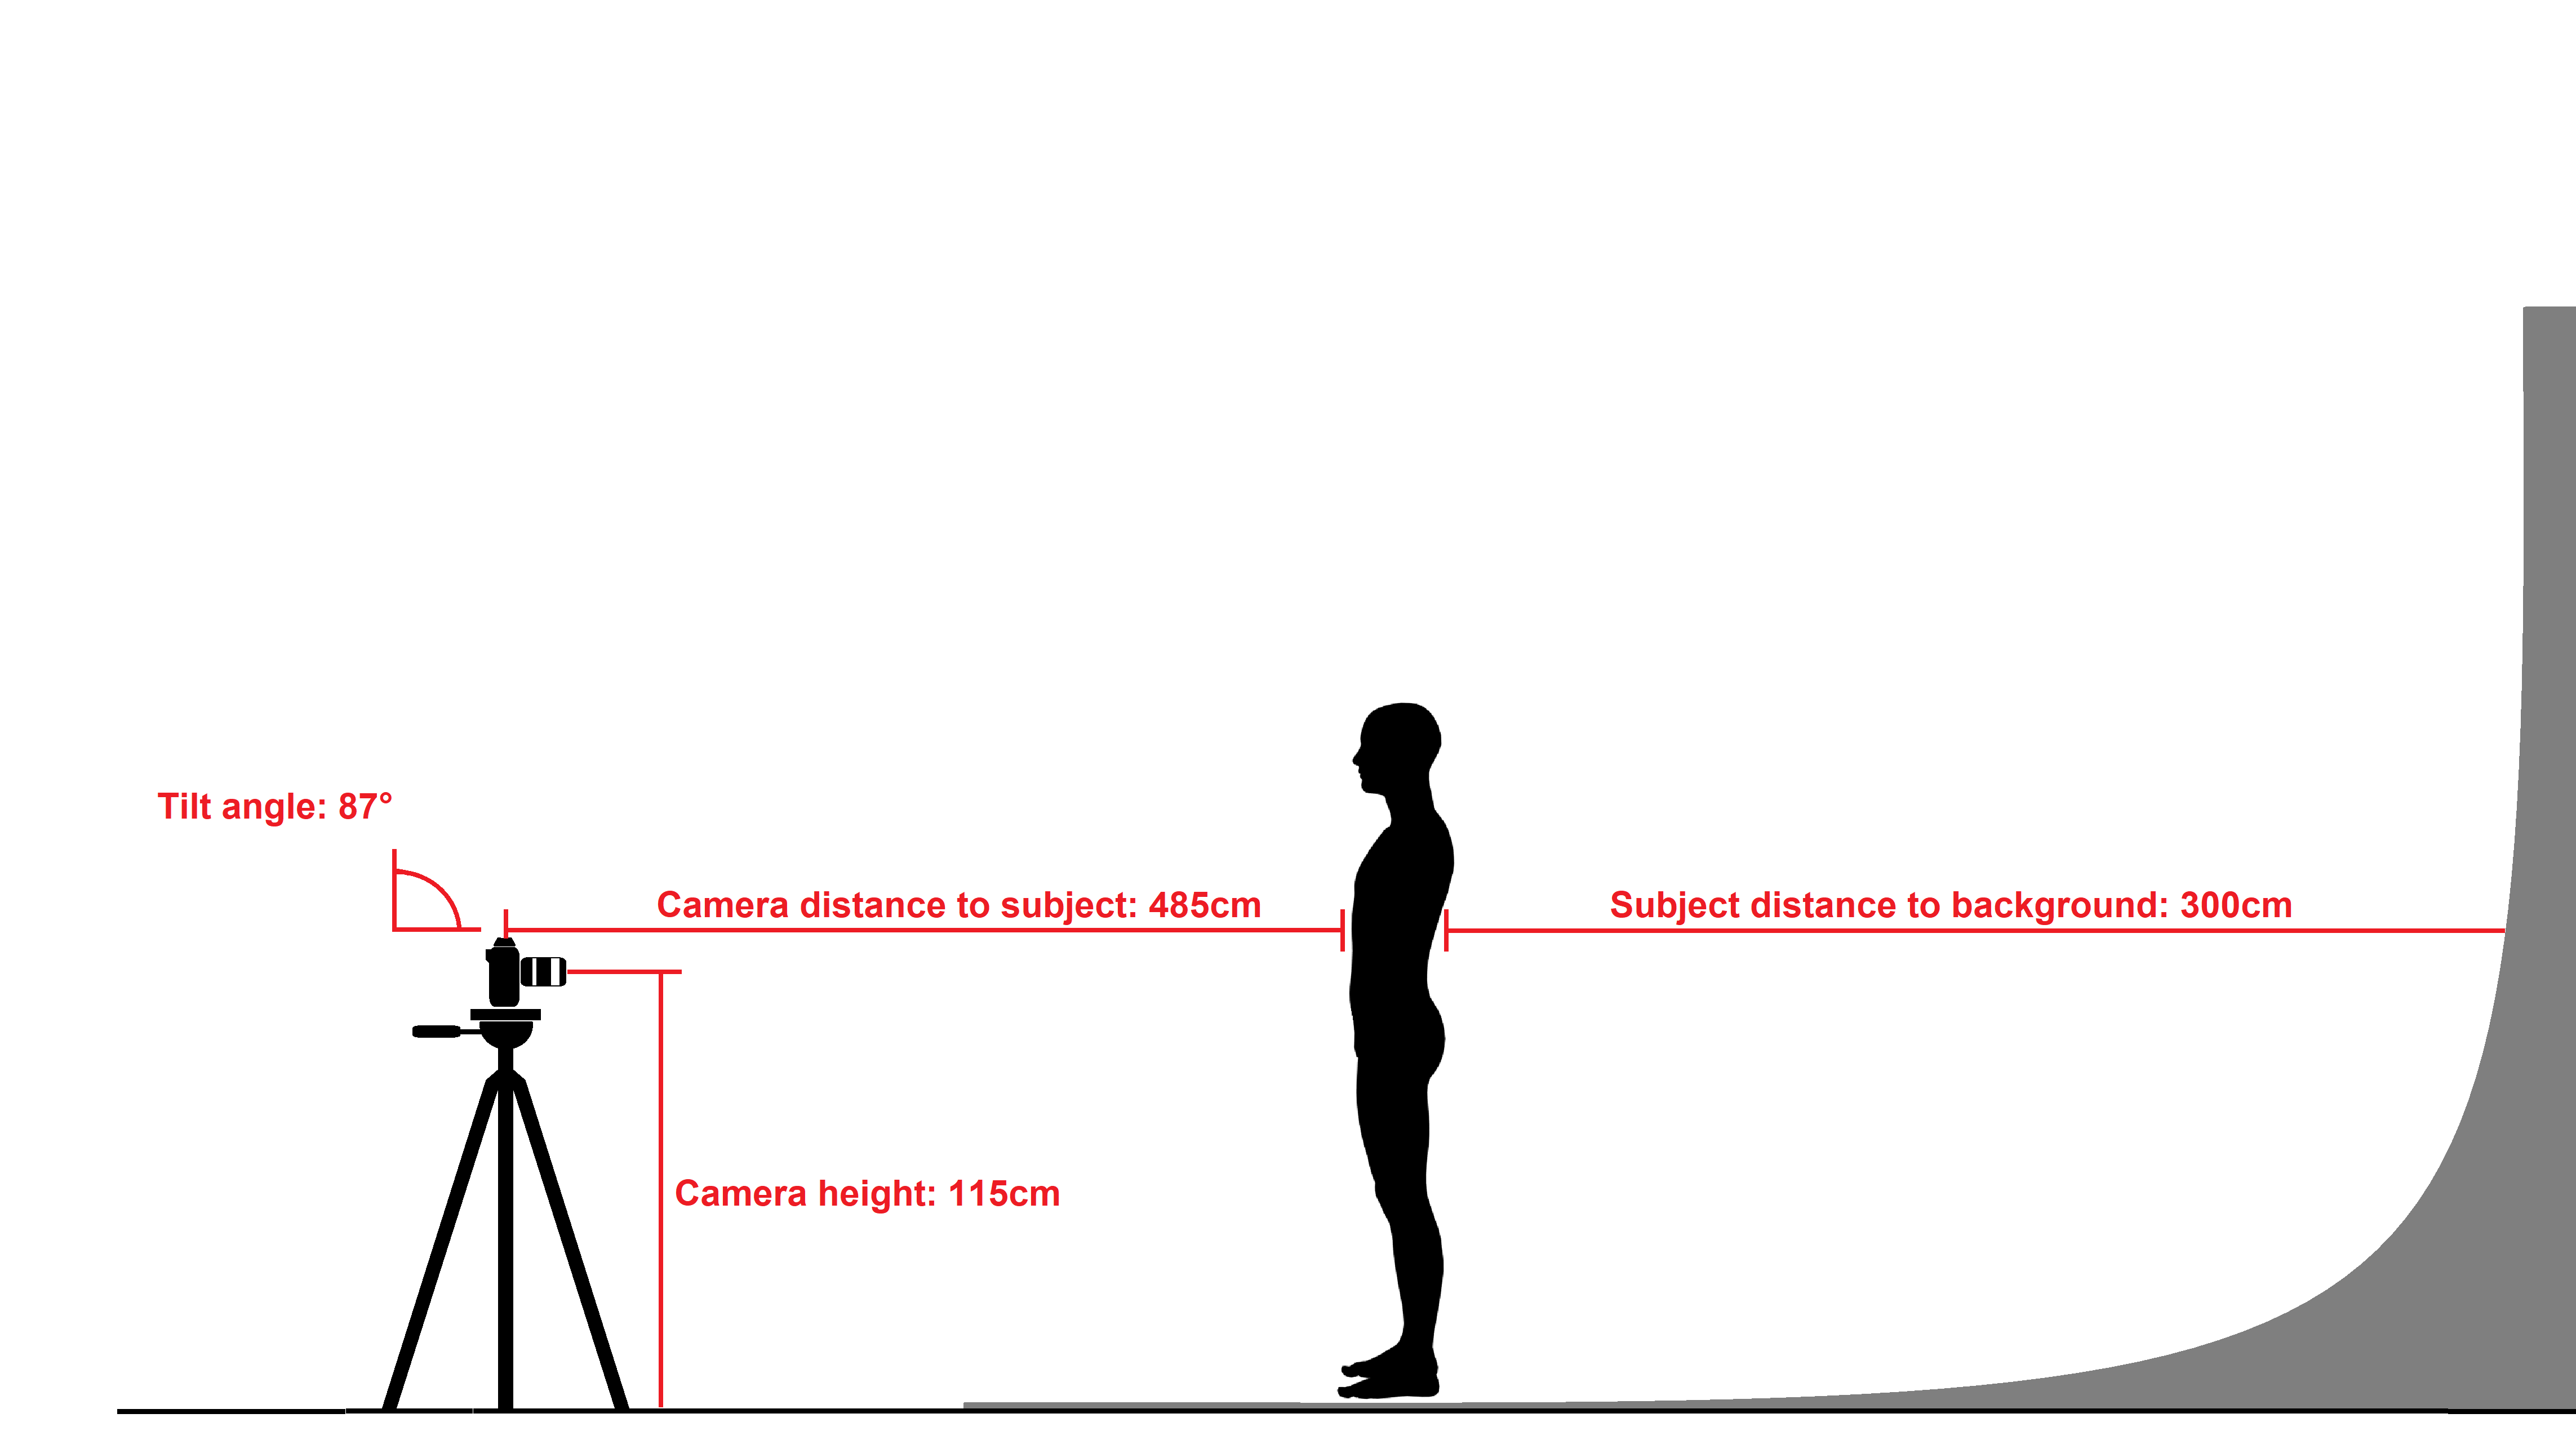
A white seamless backdrop of at least 3 meters high and 2 meters wide should be used for background. The model should stand on the backdrop at a 3 meters distance from the background. Enough backdrop should be allowed at the front of the model to cover the whole camera frame. No gaps, equipment or foreign objects should be seen within the frame. The end results should look like this:
Camera positioning
Camera height: 115cm
Camera distance to subject: 485cm
Camera tilt angle: 87° (Down tilt with 90° being level ground)
Camera settings
Camera Orientation: Portrait
ISO: Lowest possible
Shutter Speed 1/100 or higher
Focal Length: 70mm
Aperture: F11-F16
Capture Format. Jpeg (RAW?)
Important points are, making sure enough focus depth is obtained and no motion blur from the models is registered.
Lighting
The lighting should be lower contrast, soft and diffused. Lighting levels should realistically represent the respective skin tones and complexions. No excessive shininess and no dark shadows. Please reference back to the end result example posted above.
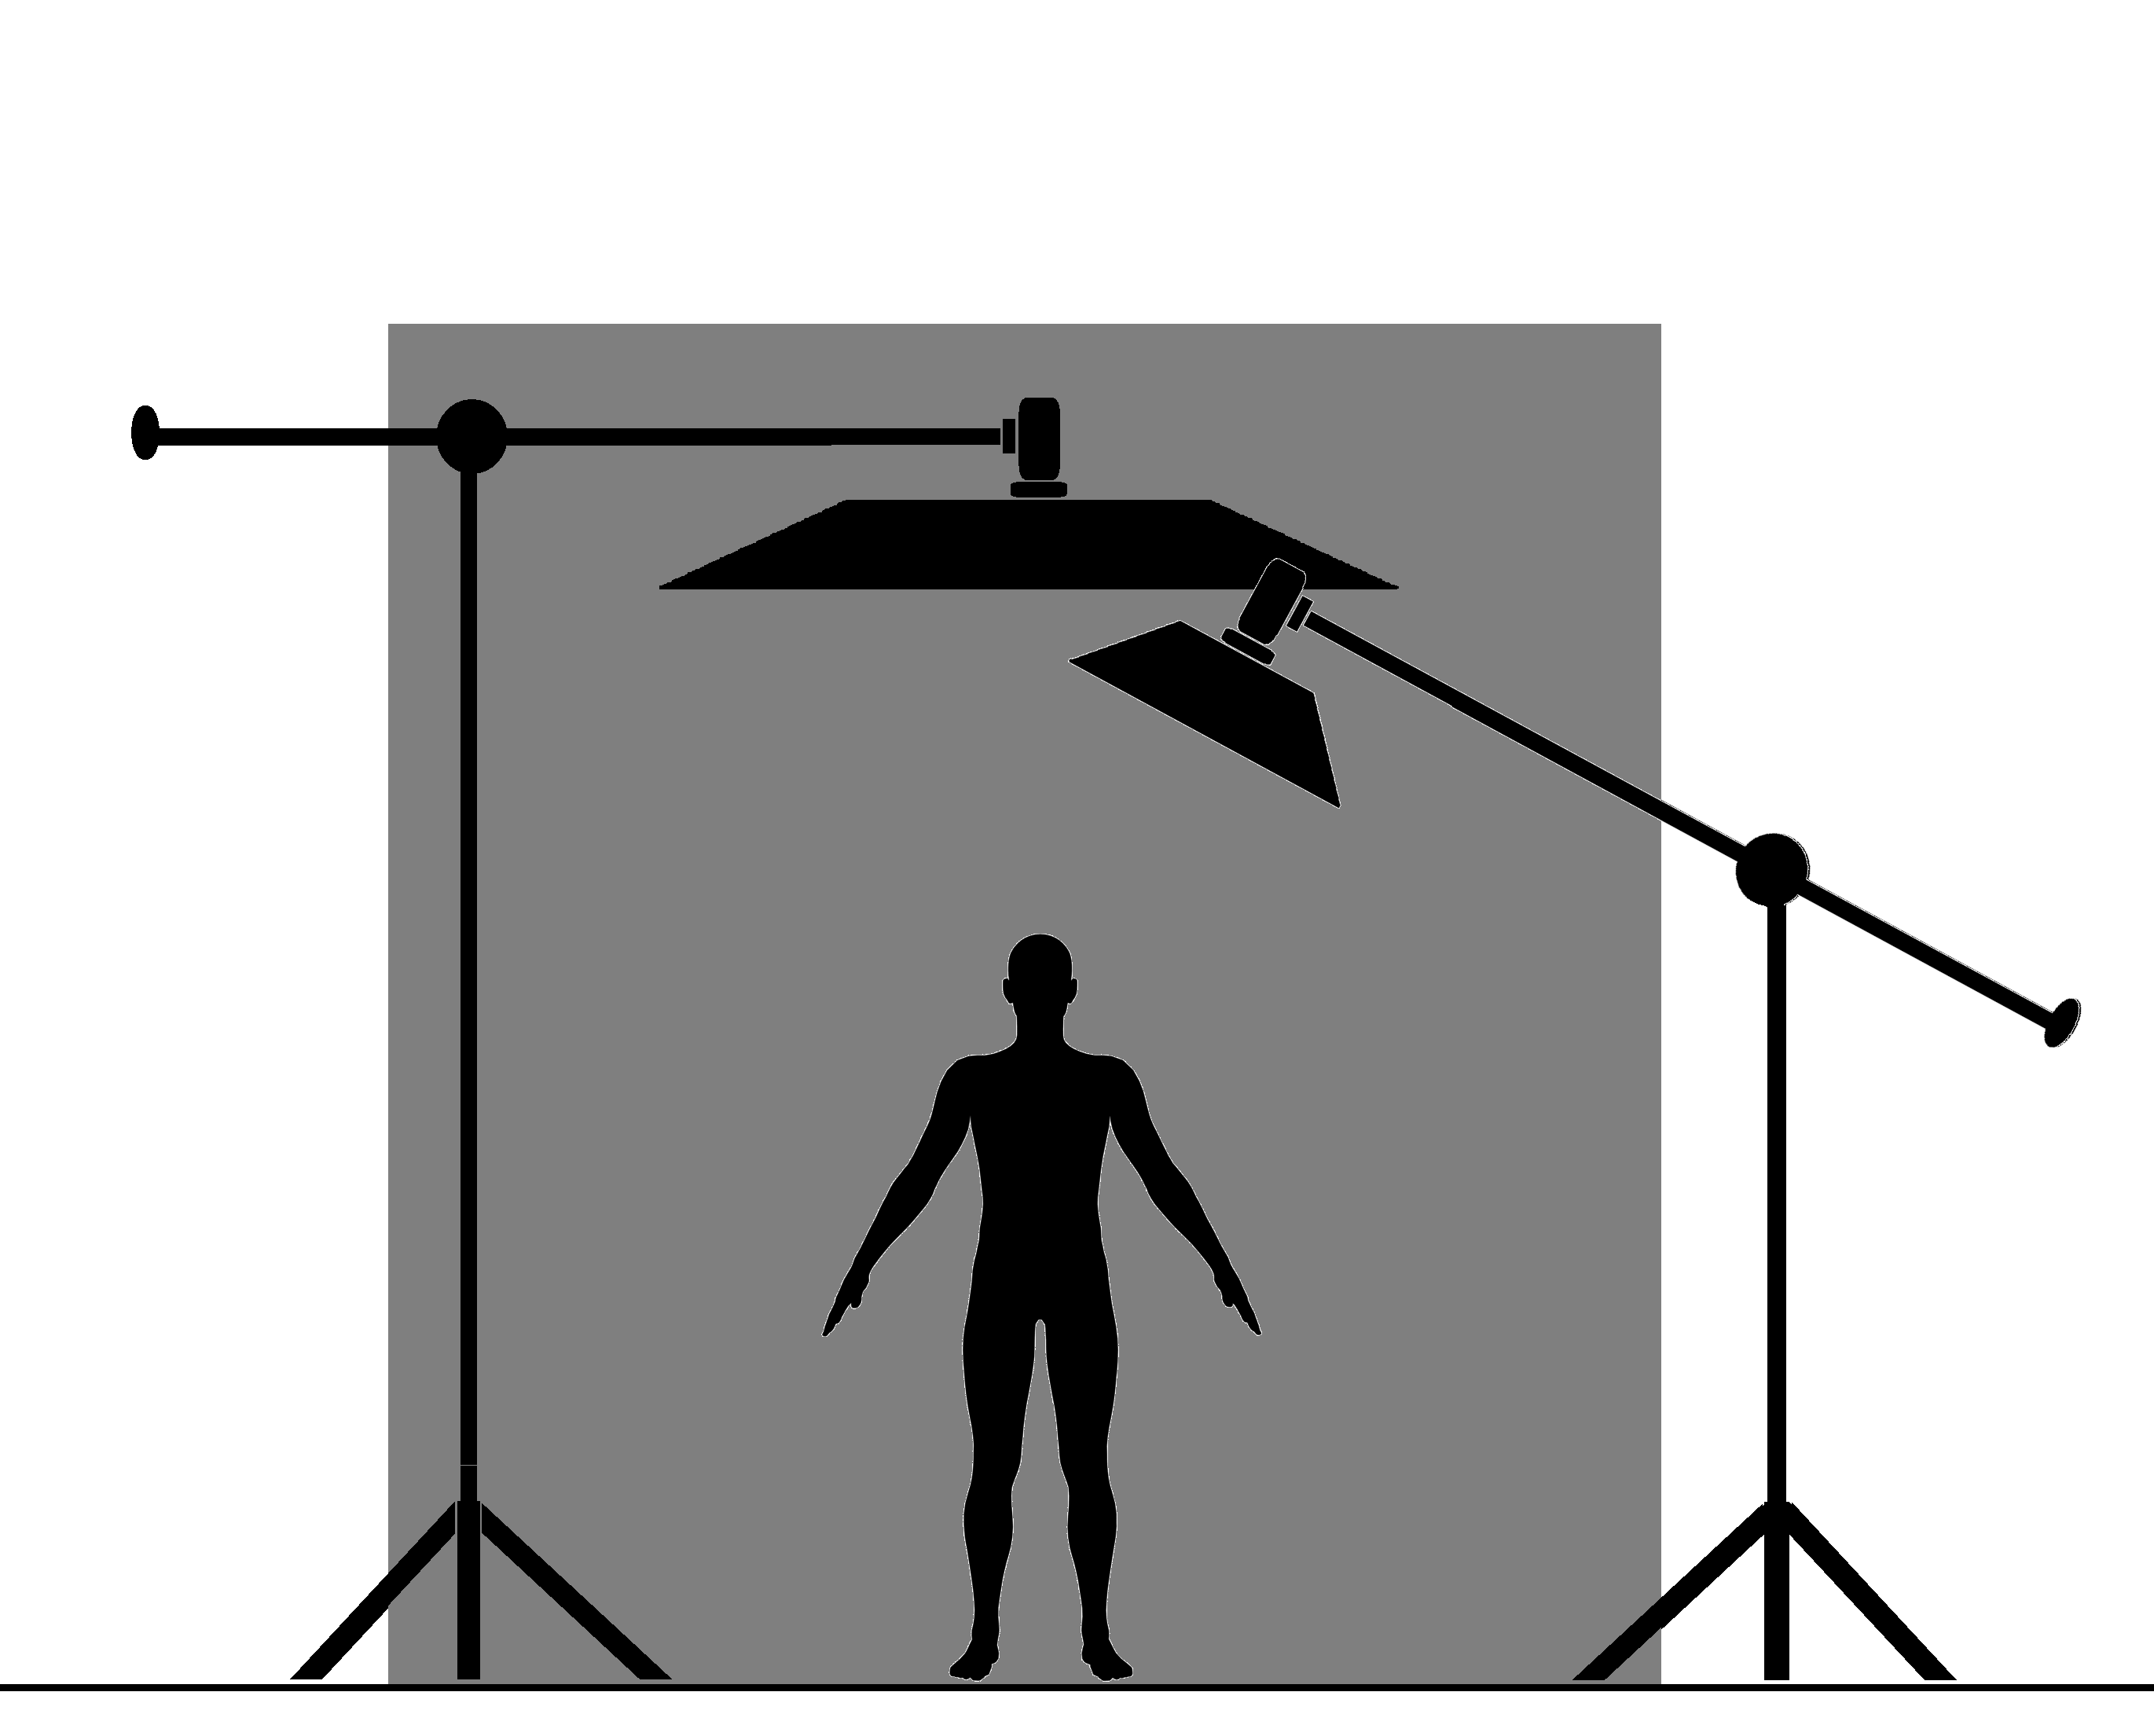
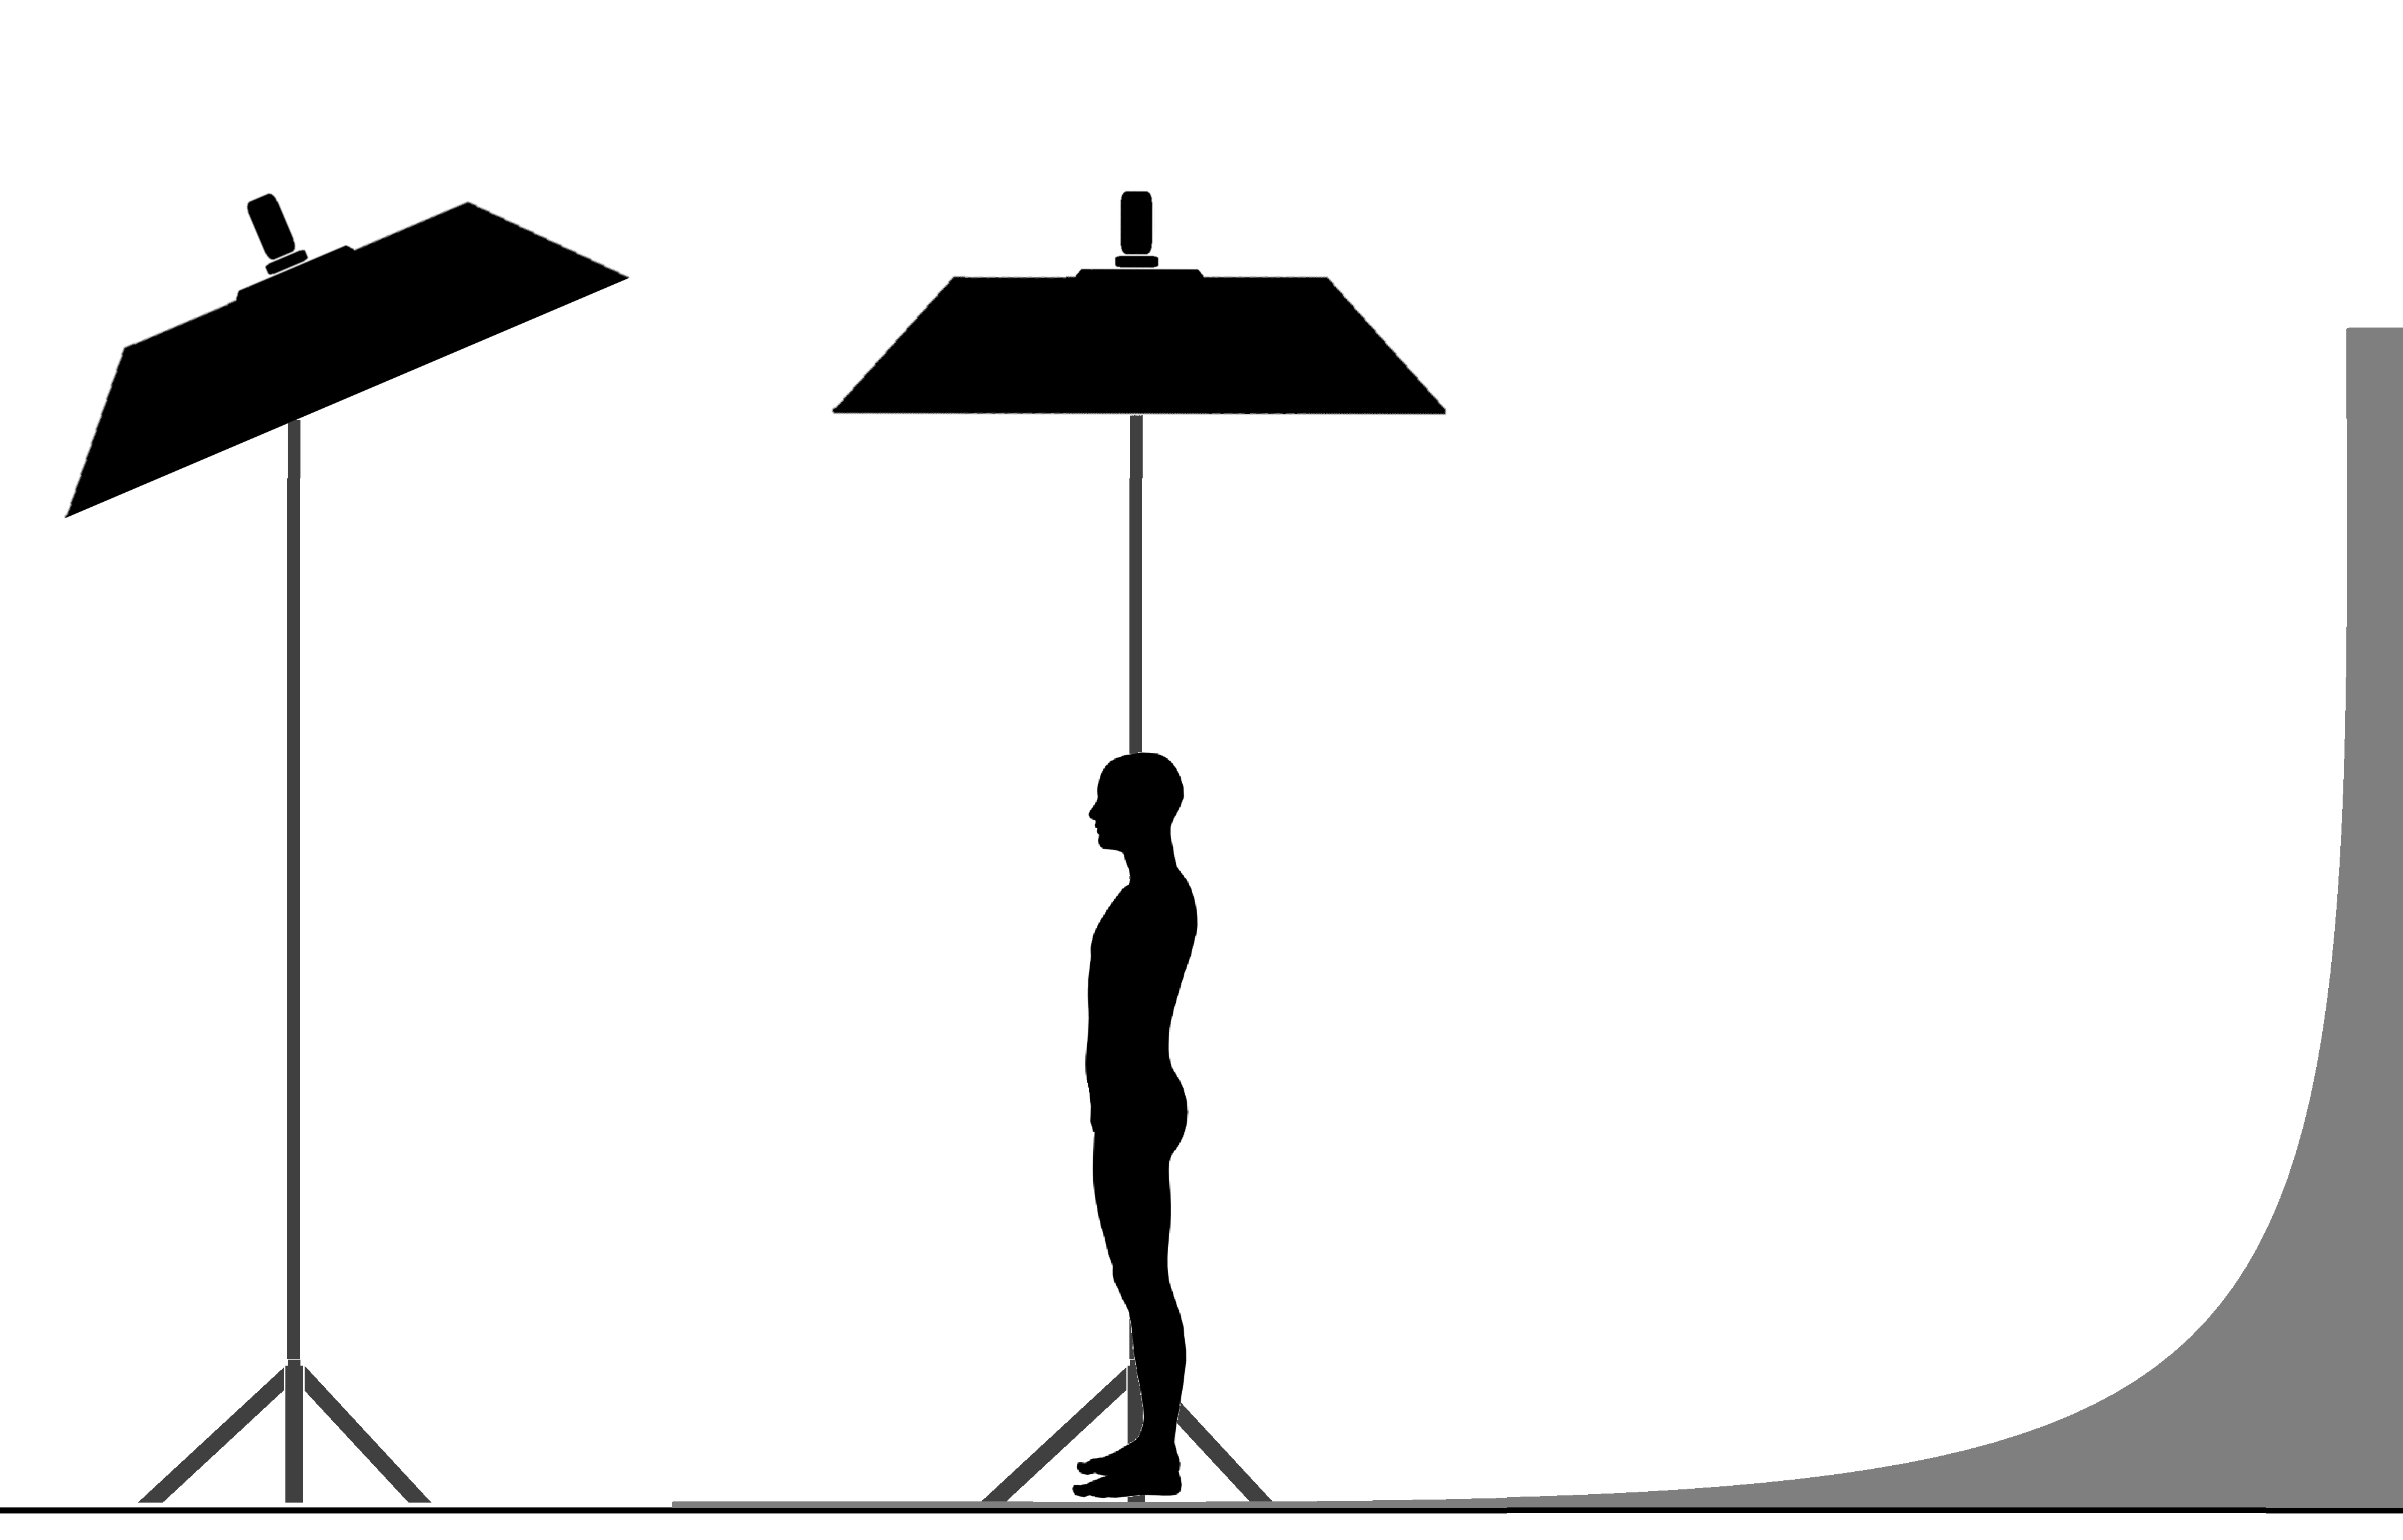
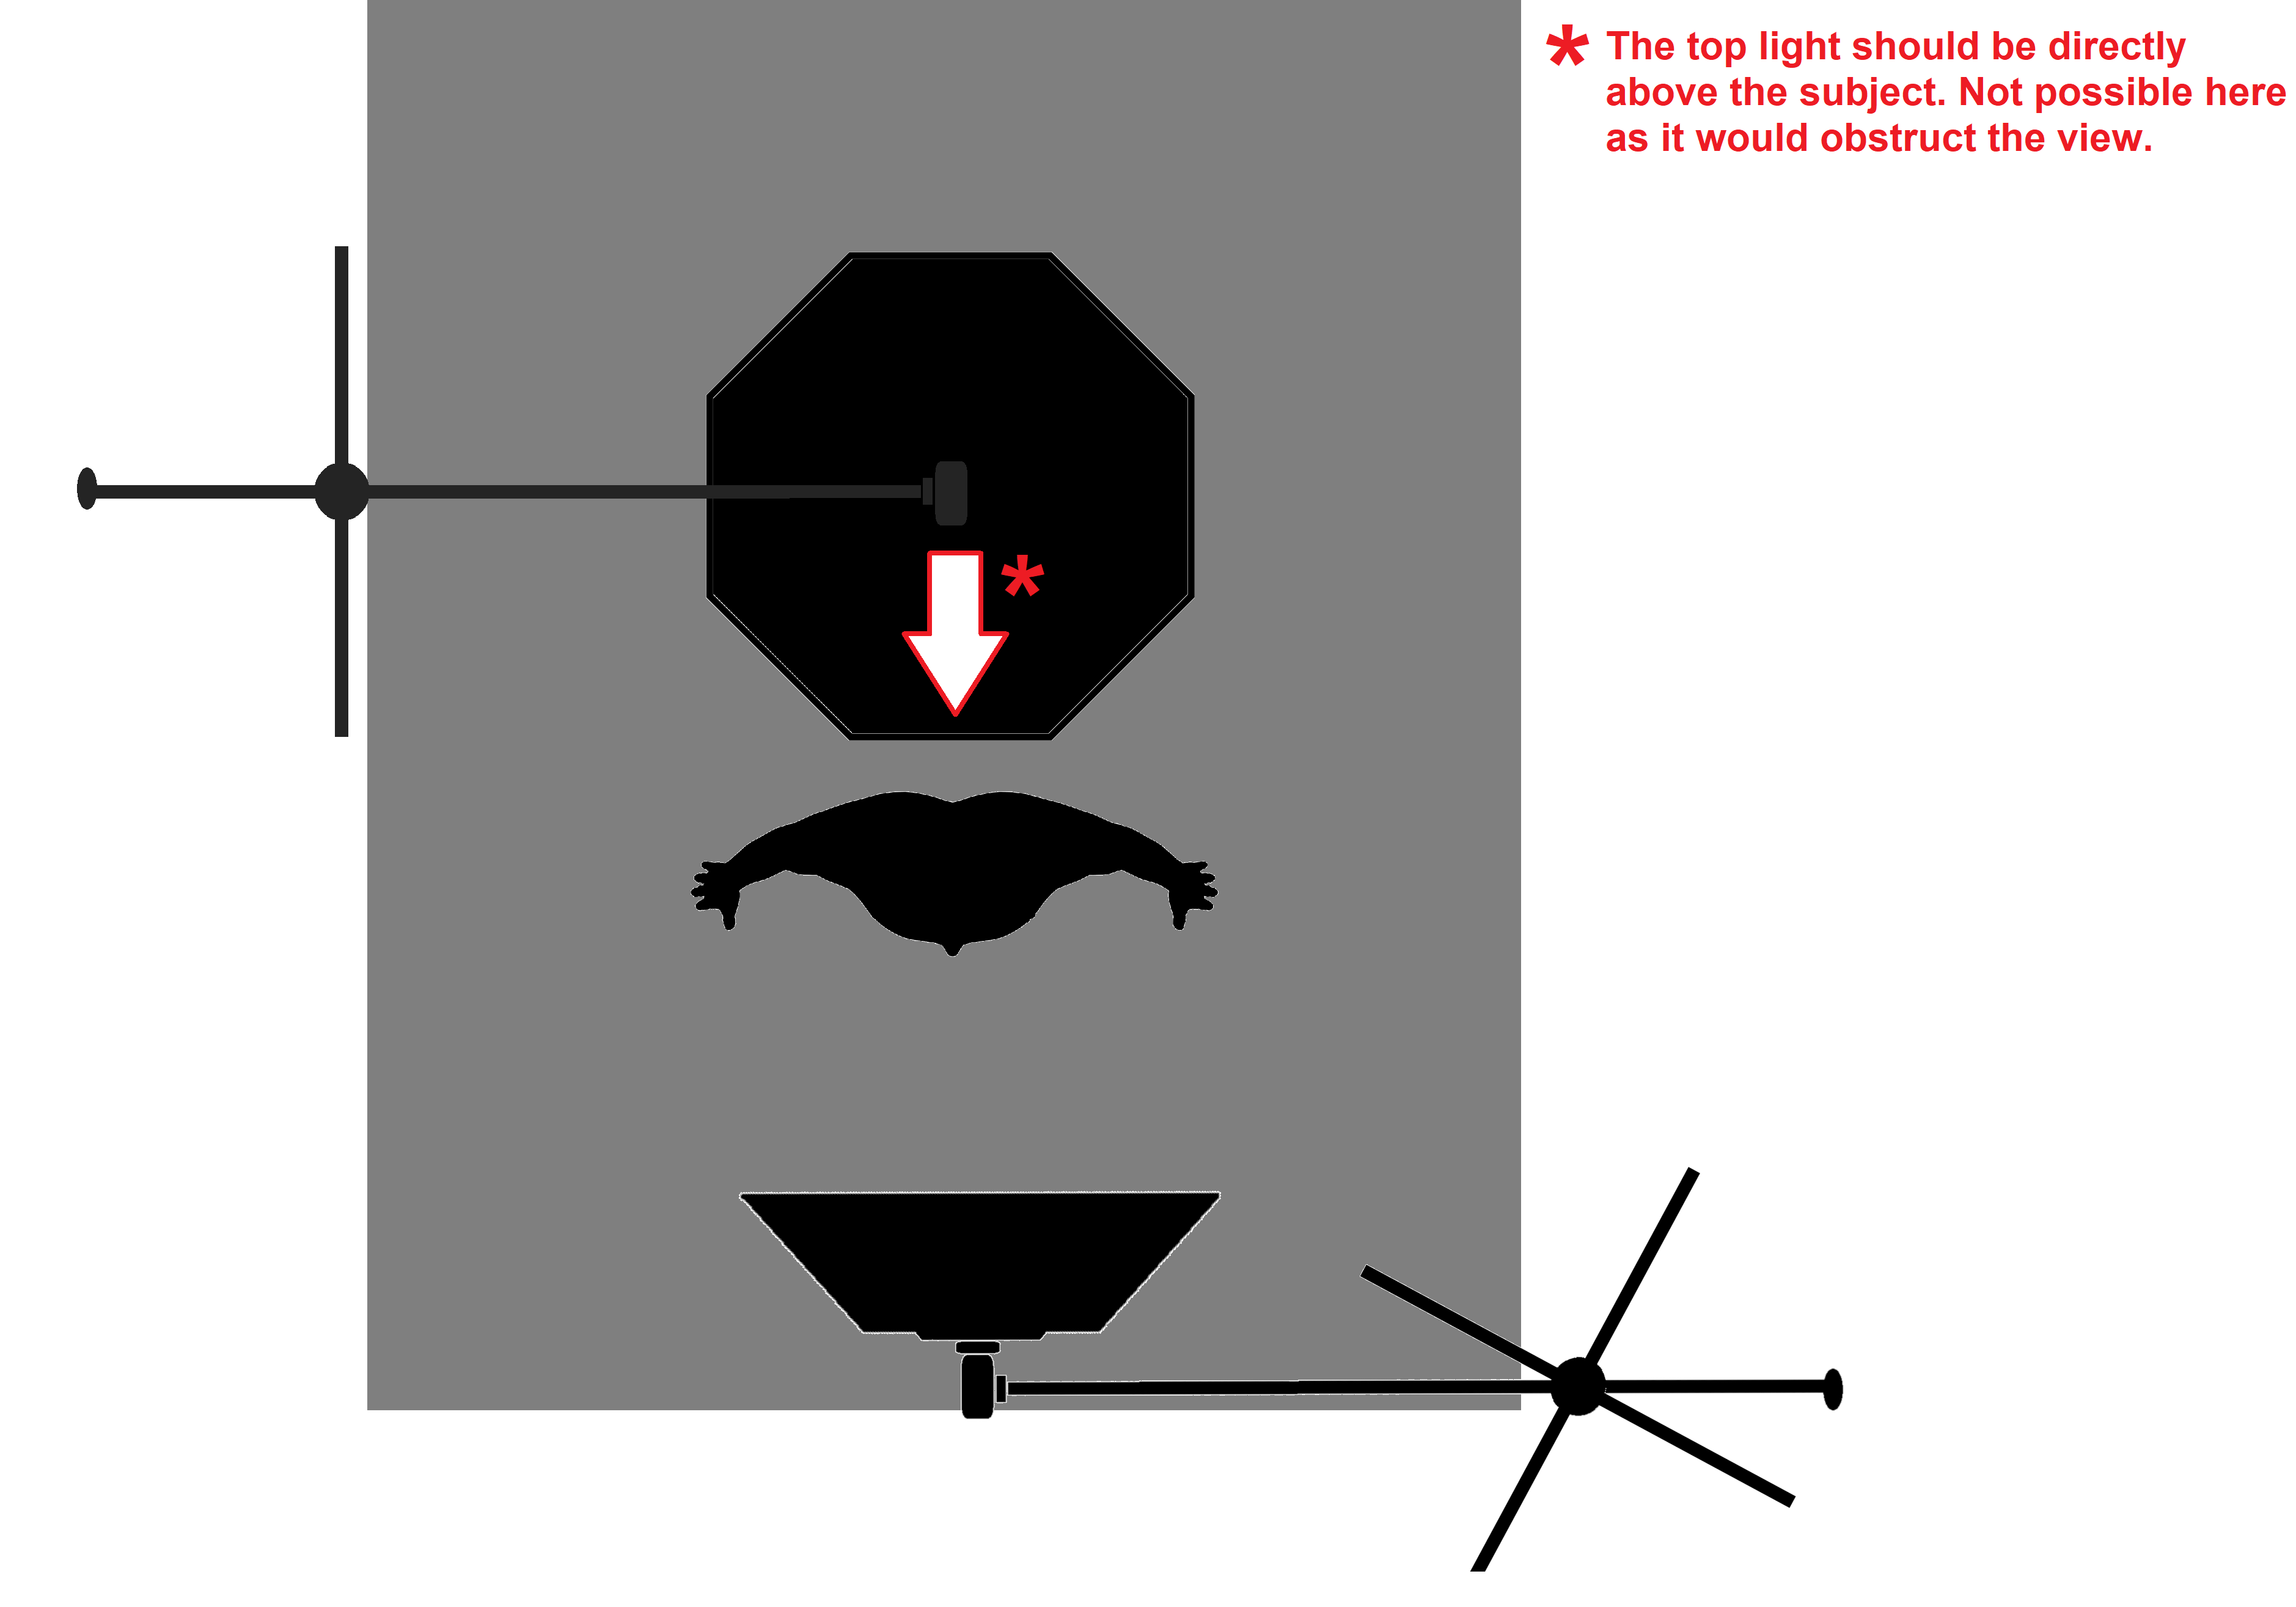
Top Light: Directly above the subject. It can be a soft-box rigged from a Jib or from railing. The objective of this light is to give direction and structure to the subject.
Key Light: The key light stands in front of the subject and doesn’t point directly at the subject. It points to the floor, in front of the subject. The objective is to provide a soft and even lighting from the front.
Background Light: The background lighting is not shown as it is a standard white background lighting set up and can be accomplished in several ways.